This article explains how to create a new retail product within Bookit Lite POS. Once a product has been added, it can appear within the POS retail screen and be sold through Point of Sale.
If you have a large number of products to set up, please contact support@bookit.co.nz to discuss the possibility of importing your product list into Bookit Lite POS.
Before creating products, we recommend reviewing the following setup articles to ensure your suppliers, categories, and stock locations are configured correctly:
Adding Sub Categories and Updating Products
Managing Booking Locations and Registers
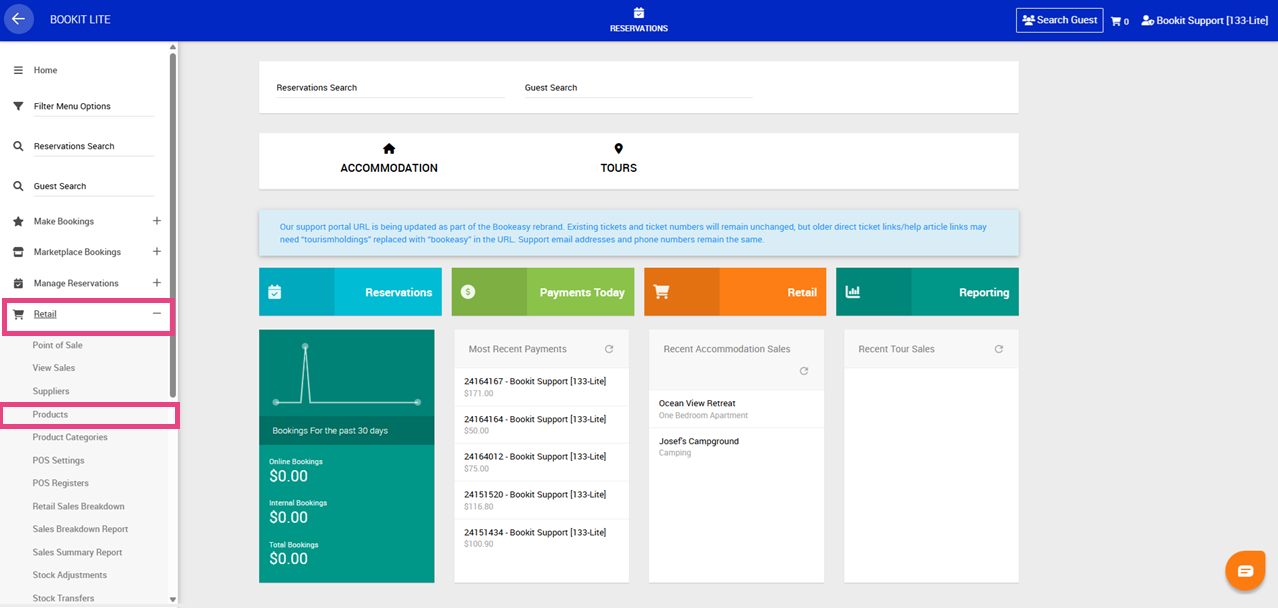
Accessing Products
1. Open the left-hand navigation menu.
2. Select Retail.
3. Select Products.
The Products screen will display all existing retail products.
Creating a New Product
1. Select New to create a new product.
2. Under the General Tab complete the following:
- Name: Enter the full product name as it should appear within POS and on receipts.
- Short Name: Enter a shortened product name if required. This is useful where screen space is limited.
- Colour: Select a button colour for the product within the POS retail screen to help staff visually identify products quickly.
- Barcode: Scan or manually enter the product barcode, or select the cog icon to generate an internal barcode. Barcodes must be unique.
- Supplier Type: Select Standard for retail products (such as apparel, souvenirs, gifts, and other items sold through the retail section of the POS). Select Miscellaneous for non-retail items sold through the Miscellaneous tab of the POS screen (such as third-party services or charges).
- Active: Select Yes or No to control whether the product is available within POS.
- Internal Sales: Select Yes or No to control whether the product is available for sale through POS. Recommended setting is Yes.
- Web Sales: Select Yes or No to control whether the product is available for online sales. Recommended setting is No unless your centre sells products online.
- Use Stock: Select Yes or No to control whether stock-on-hand is tracked for the product. If enabled, stock levels automatically reduce when products are sold.
- Net Cost: Enter the supplier cost price excluding GST.
- Markup Type: Select Percent or Dollar if you would like Bookit Lite to automatically calculate the retail price.
- Markup: The retail price will automatically calculate based on the selected markup type.
- Retail Price: Enter the customer selling price including GST. Products must have a retail price before they can be sold.
- Use GST: Select Yes or No to control whether GST applies to the product.
- GST on Retail: Displays the GST portion of the retail price. This value automatically calculates when GST is enabled.
- PLU Code: Enter the PLU (Price Look-Up) code used within POS. PLU codes must be unique.
- Allow Discount: Select Yes or No to control whether staff can apply discounts to the product during a sale.
- GL Code / Cost Centre Code: Optional accounting codes used for reporting or finance system exports.
- Editable Price: Select Yes or No to control whether staff can manually change the product price during a POS transaction.
- Supplier: Select the supplier linked to the product.
3. Select Save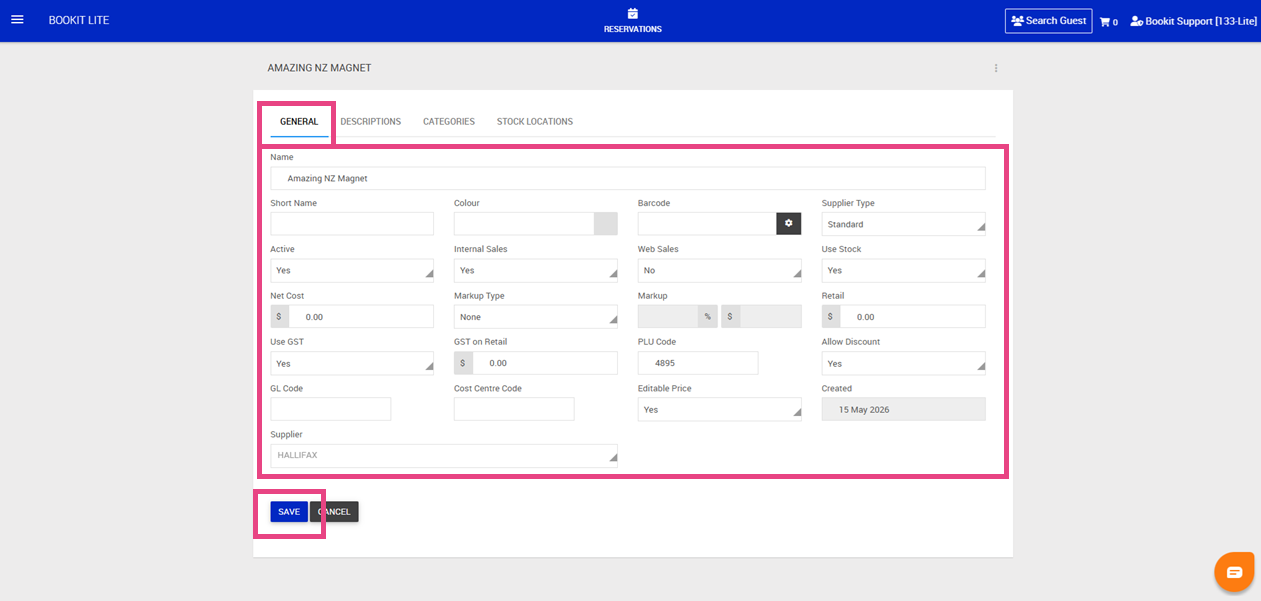
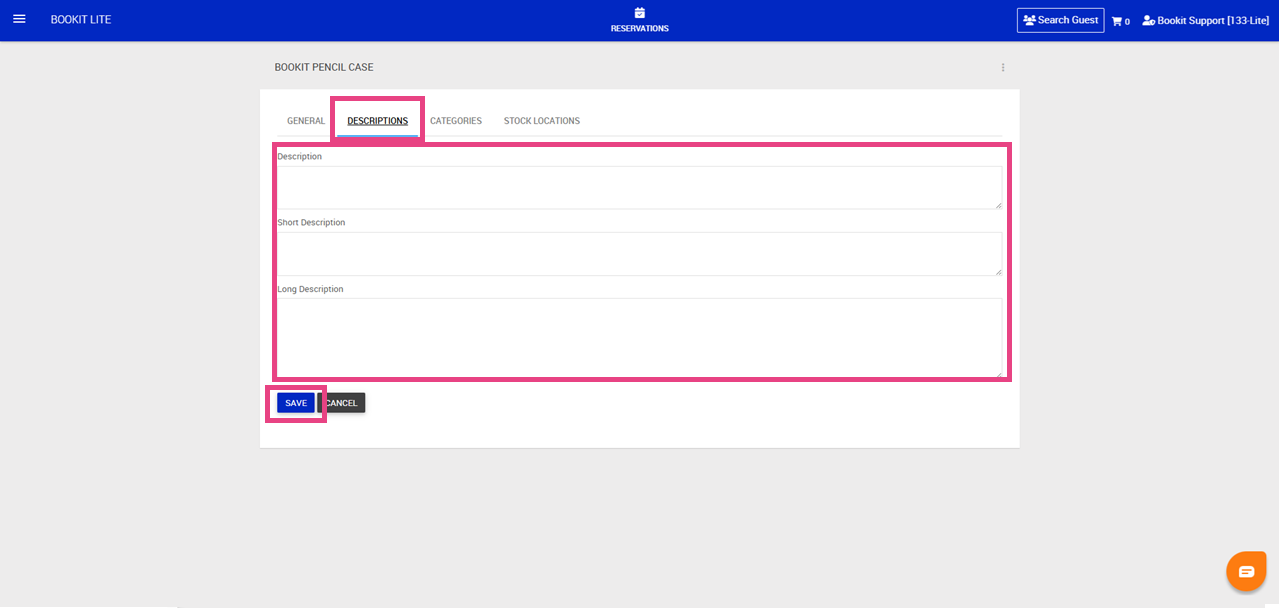
4. Click the Descriptions tab
5. Add in product descriptions (Optional): These fields are primarily used for online sales and additional product information.
6. Select Save
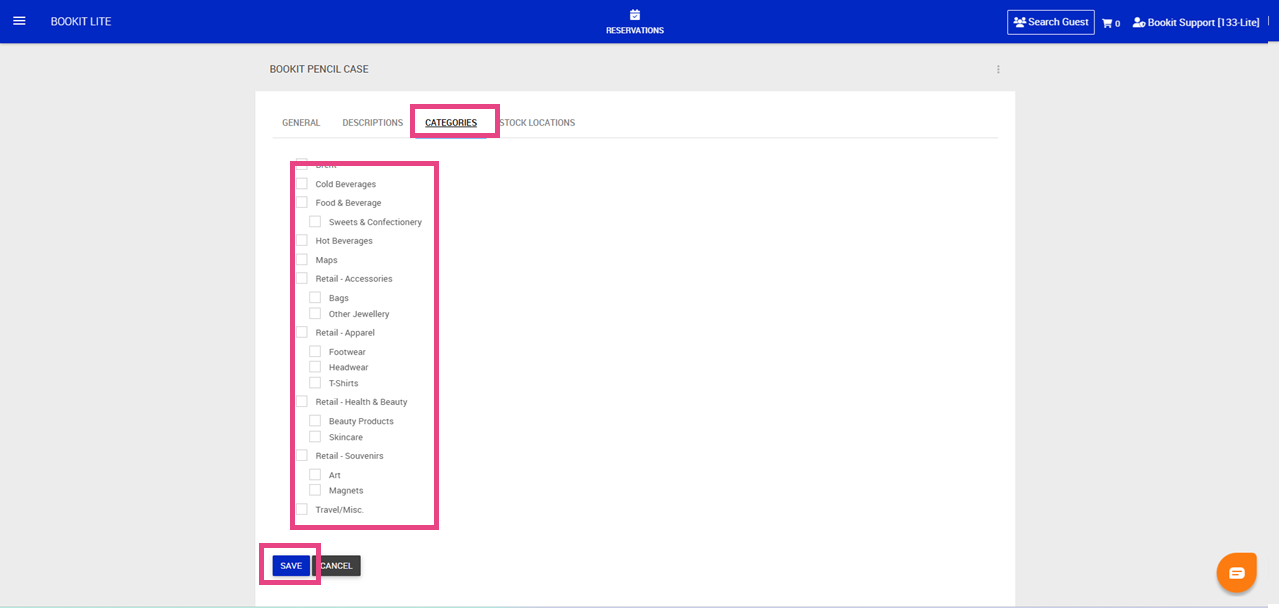
7. Click the Categories Tab
8. Check a Category and Subcategory (Categories determine where the product appears within the POS retail screen)
9. Select Save
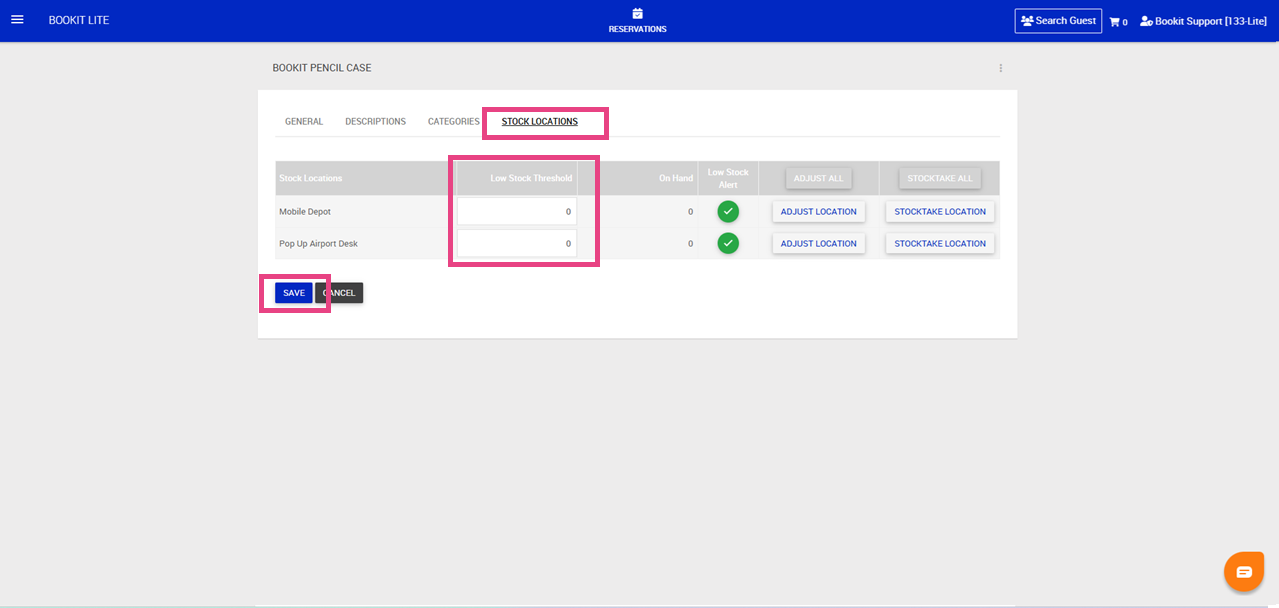
10. Click the Stock Locations Tab
11. Complete the following;
- Low Stock Threshold: Set a Low Stock Threshold for each location (you'll be warned when stock dips below this number)
12. Select Save
Note:
- Products require a retail price before they can be sold.
- Barcodes and PLU codes must be unique.
- Categories control where products display within POS.