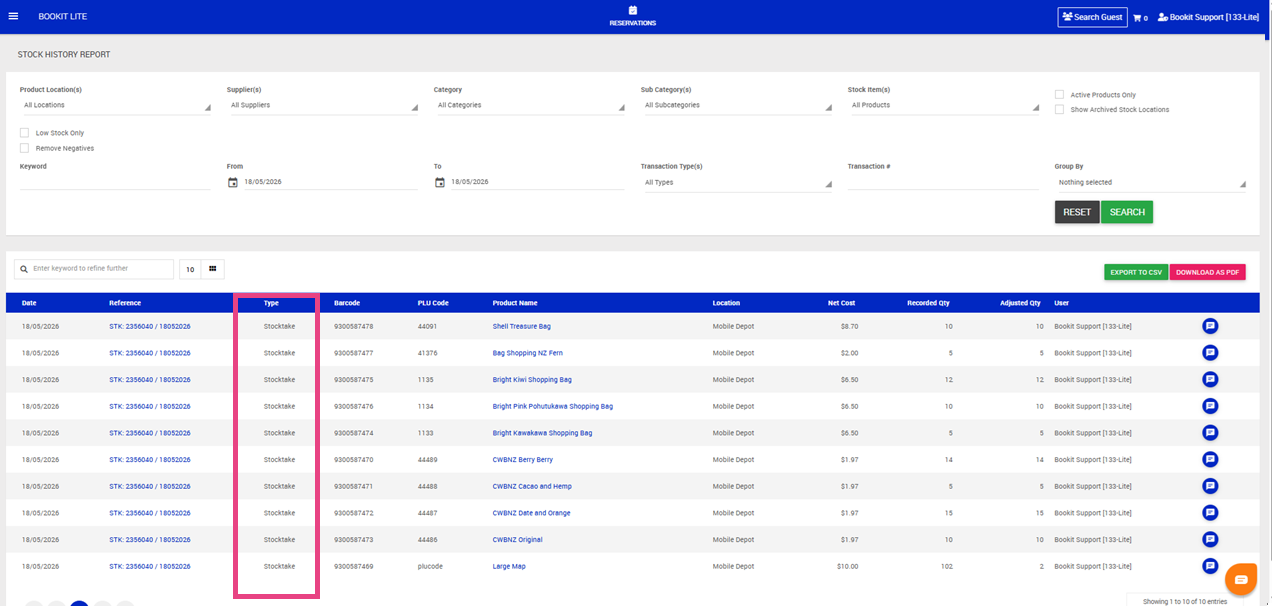
This article explains how to complete a stocktake within Bookit Lite POS, including searching for products, filtering stock locations, updating stock quantities, and submitting the completed stocktake.
Accessing Stocktake
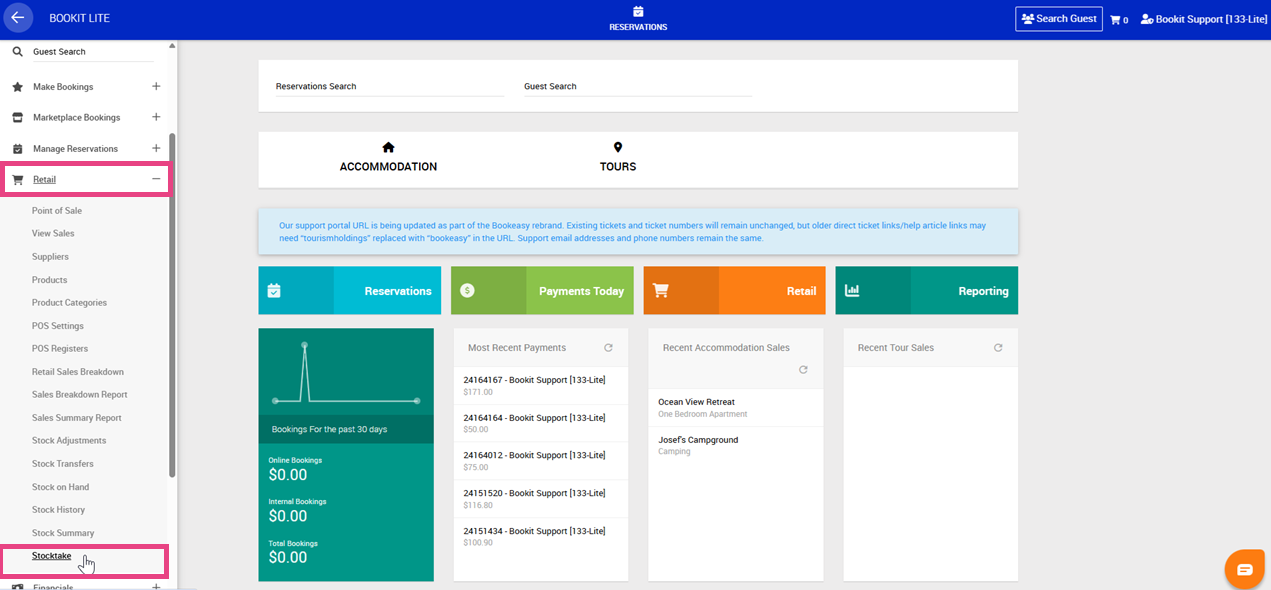
1. Open the left-hand navigation menu.
2. Select Retail.
3. Select Stocktake.
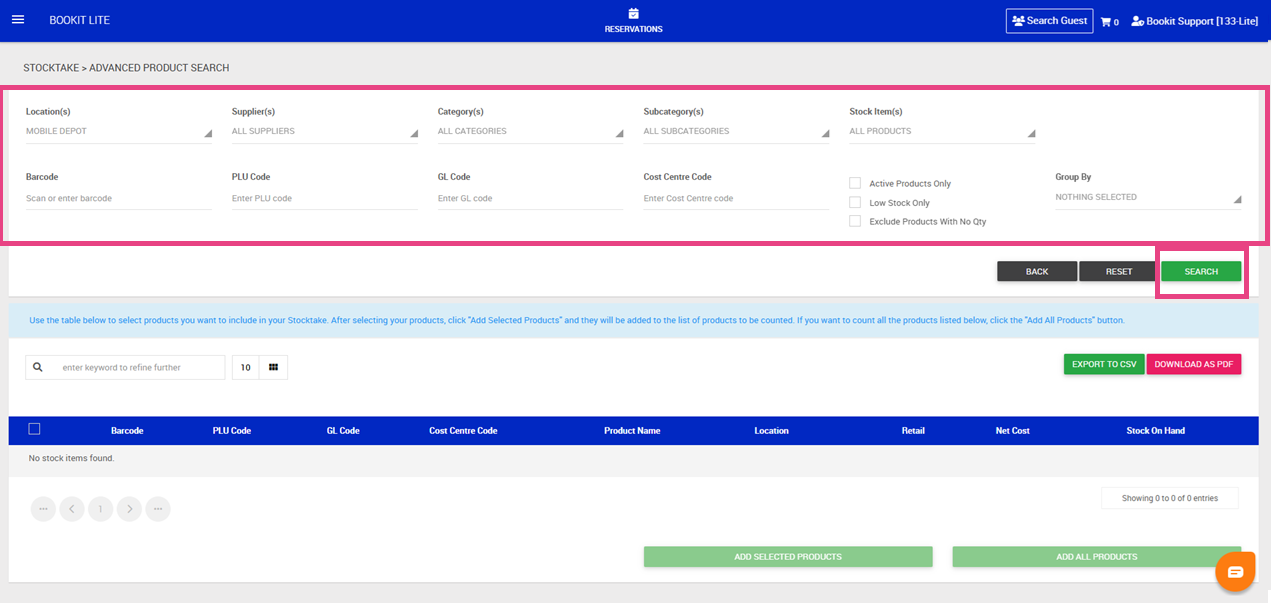
Searching for Products
1. Select Advanced Search to display all available filters.
2. Apply the desired filters. Available filters include:
- Stock Location
- Suppliers
- Categories and Sub Categories
- Products
- Barcode
- PLU Code
- Accounting Code
- Display Options
3. Once filters have been selected, click Search.
Updating Product Pricing
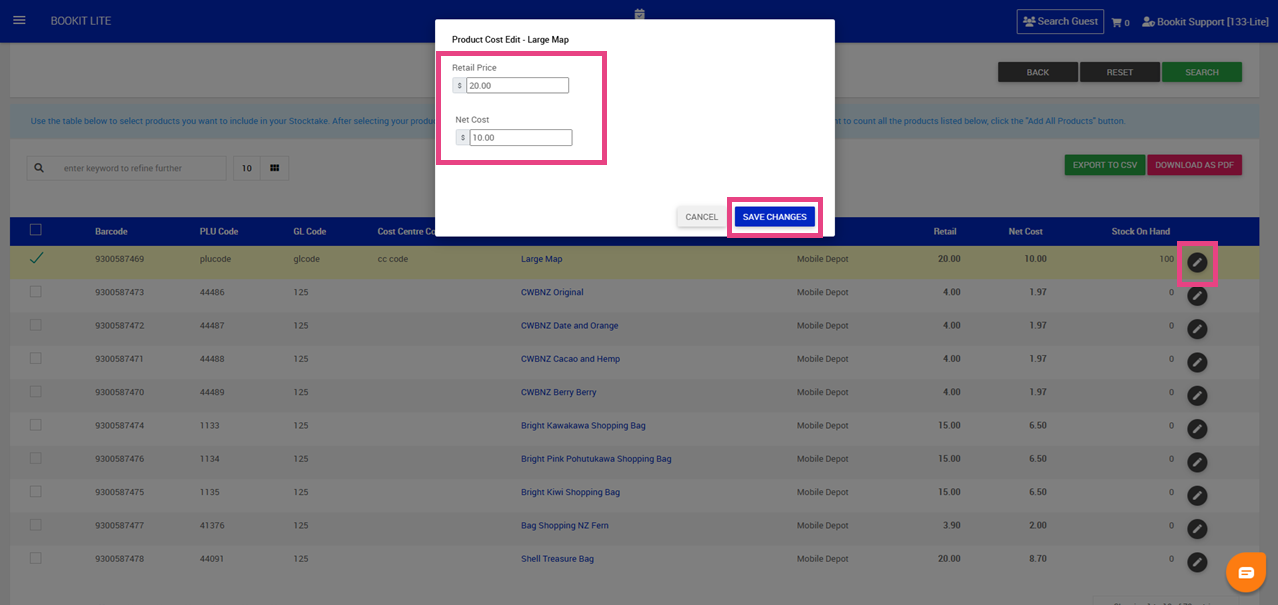
Retail price and net cost can be updated during the stocktake process if required.
To update pricing
1. Locate the required product.
2. Select the pencil icon to the right of the item.
3. Update:
- Retail Price
- Net Cost
4. Click Save Changes
Important: Updating pricing during stocktake will override the pricing configured within the product setup.
Display Options
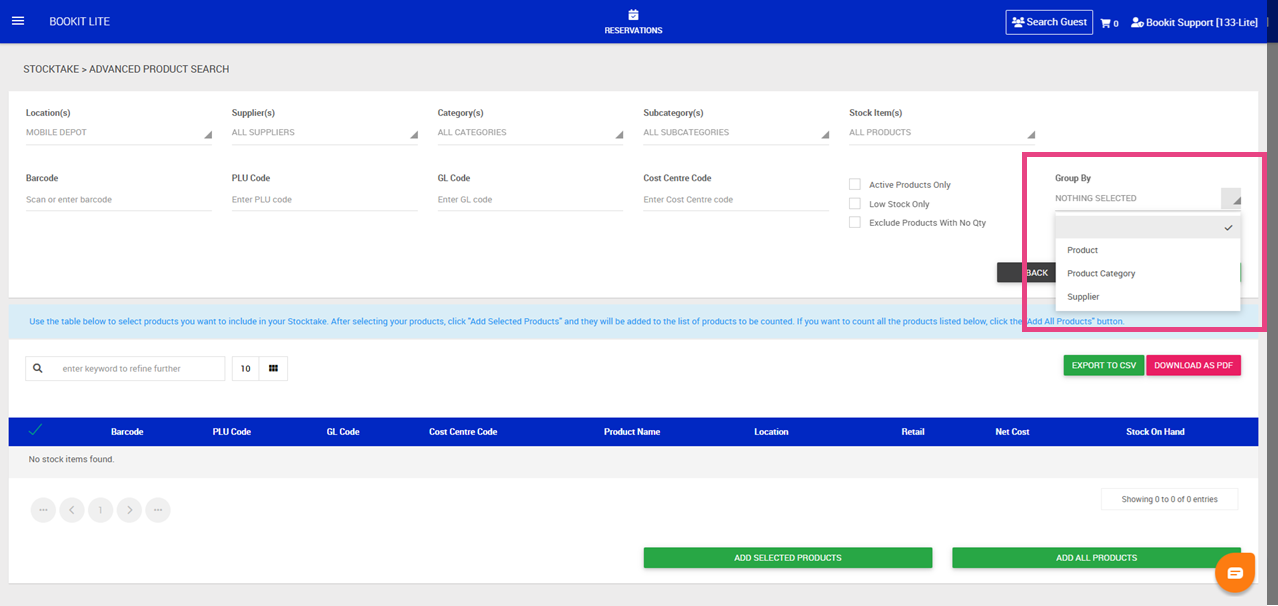
The Group By filter controls how products are grouped during the stocktake process. Click Advanced Search to access this filter.
Available options include:
- Group by Product – displays products grouped by product name
- Group by Product Category – displays products grouped by category
- Group by Supplier – displays products grouped by supplier
Depending on the selected option, product details such as barcode, PLU code, location, retail price, net cost, and stock on hand will display underneath each group heading. Headings will be displayed in red.
Selecting Products for Stocktake
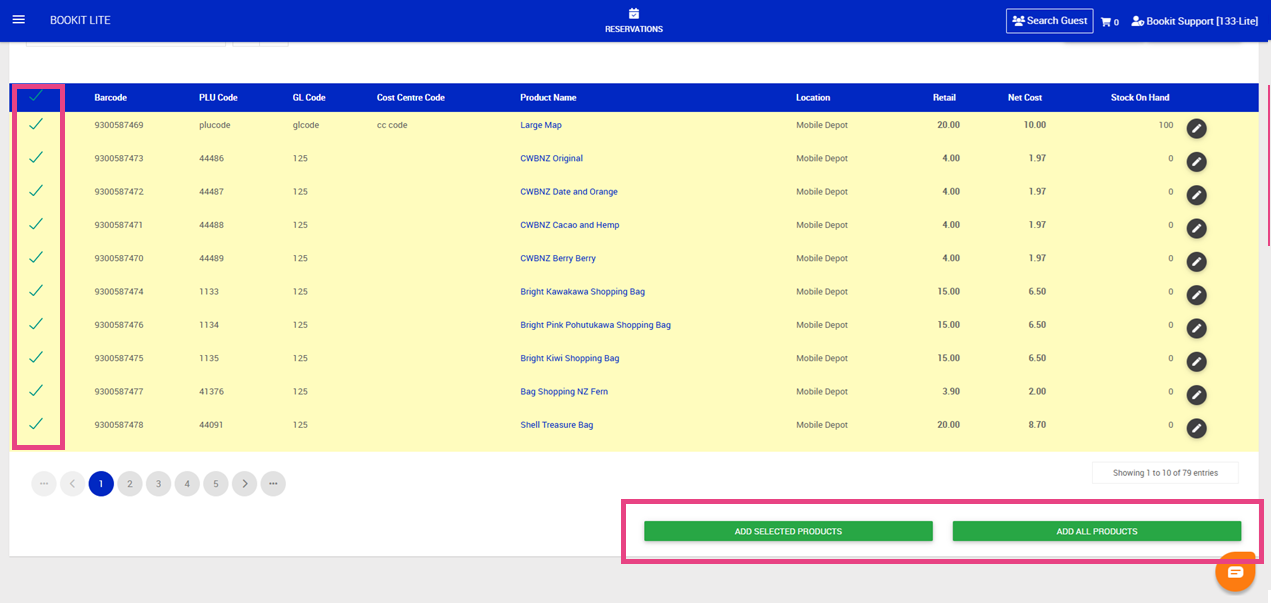
After searching, products can be selected for counting.
1. Select individual items by ticking the check box and click Add Selected Products or
2. Add All Product to bring all products through for stocktake
Updating Stock on Hand
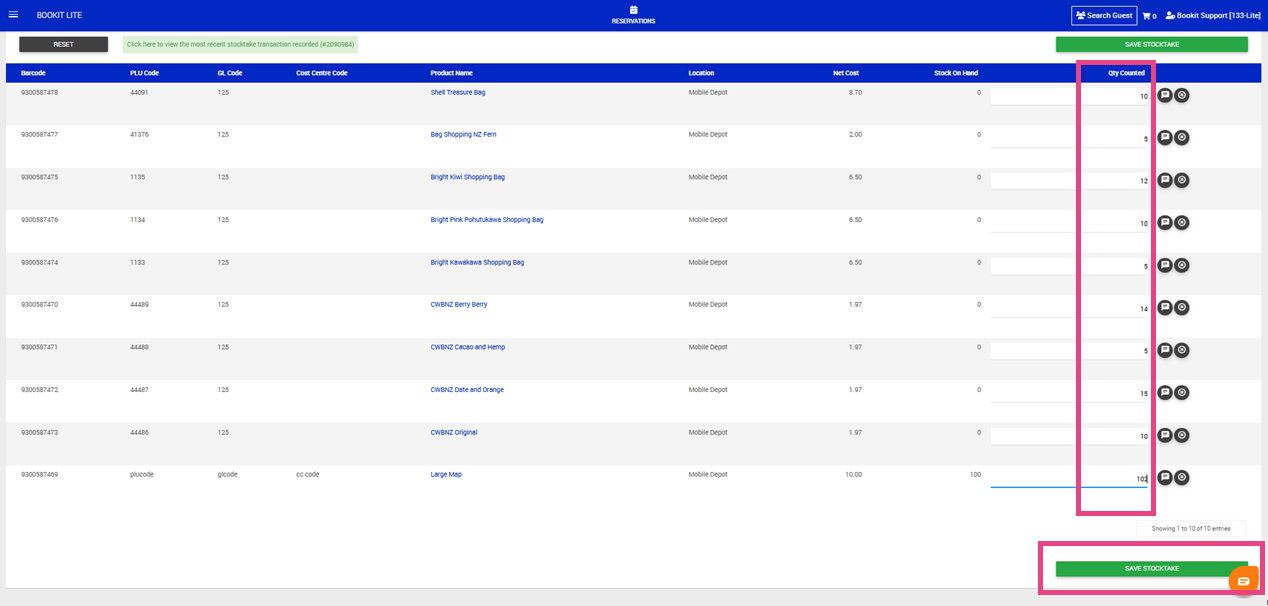
Stock quantities can be updated during the stocktake process.
To update stock quantities:
1. Review the current stock on hand value.
2. Enter the quantity counted.
3. Add notes if required using the speech bubble icon.
4. Remove products from the stocktake if required by clicking the x icon
5. Once completed, select Save Stocktake.
Submitting the Stocktake
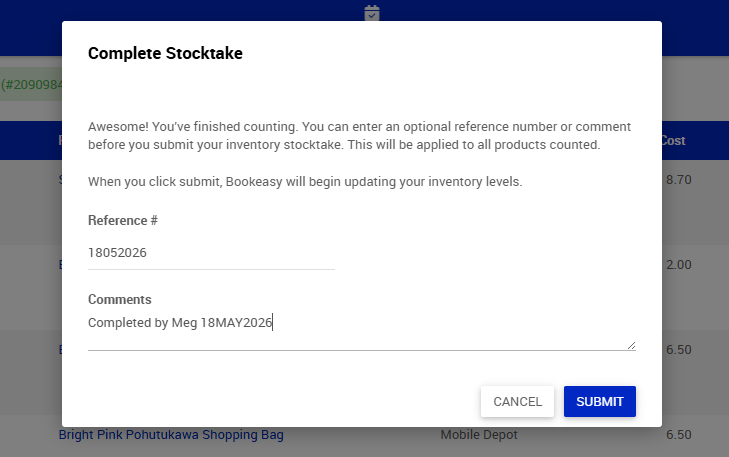
After selecting Save Stocktake, a confirmation pop-up will appear.
To submit the stocktake
1. Enter a reference number and comments if required.
2. Select Submit.
The stocktake will now update stock levels for the selected stock location.
Key Reminders
- Stocktakes are completed per stock location.
- Advanced Search filters can help narrow large product lists.
- Pricing changes made during stocktake override product setup pricing.
- Notes can be added against stocktake items.
- Stock quantities update once the stocktake is submitted.
Viewing Previous Stocktakes
Previous stocktake transactions can be viewed from the Stocktake or Stock History screens.
To view the most recent stocktake
1. Open the left-hand navigation menu.
2. Select Retail.
3. Select Stocktake.
4. Select Click here to view the most recent stocktake transaction recorded (Ref#).
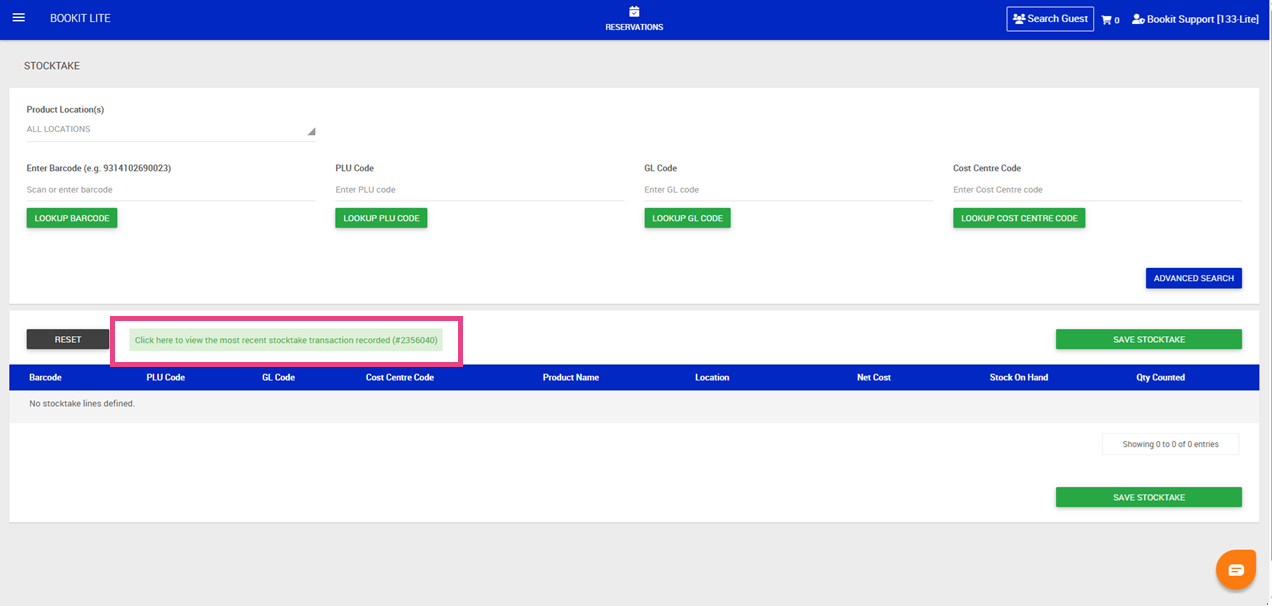
To view stock history
1. Open the left-hand navigation menu.
2. Select Retail.
3. Select Stock History.