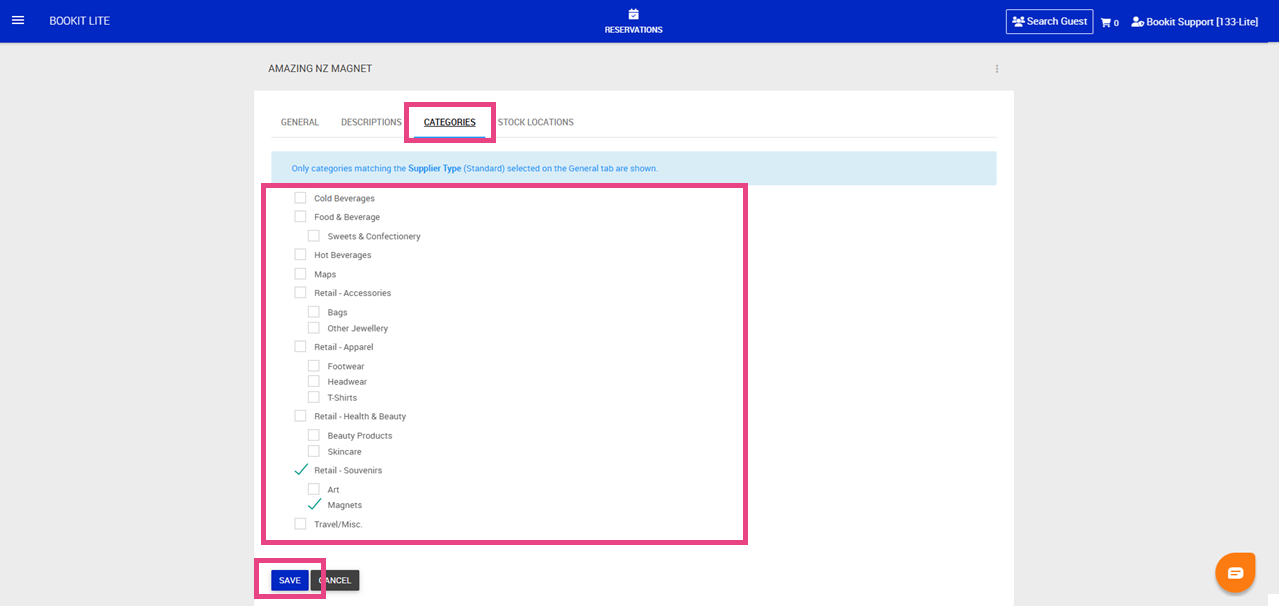
This article explains how to create and manage product sub categories and update retail products within Bookit Lite POS. Product categories and sub categories determine how products are grouped and displayed within the POS retail screen, helping staff quickly locate items during a sale. Parent product categories are standardised by Tourism New Zealand for reporting consistency, however centres can create and manage their own sub categories as required.
Adding/ Editing a New Sub Category
Sub categories can be created to further organise products within the POS retail screen.
To create/edit a sub category
1. Open the left-hand navigation menu.
2. Select Retail.
3. Select Product Categories.
4. Select the pencil icon to the right to edit an existing sub category, or select New to create a new sub category from scratch.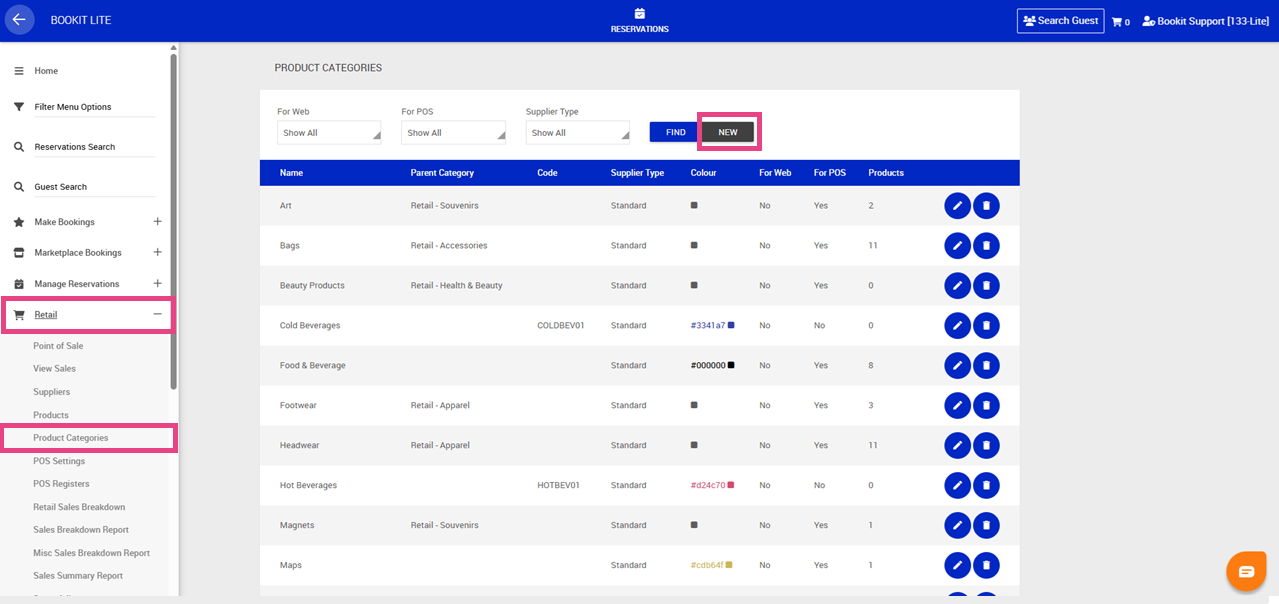
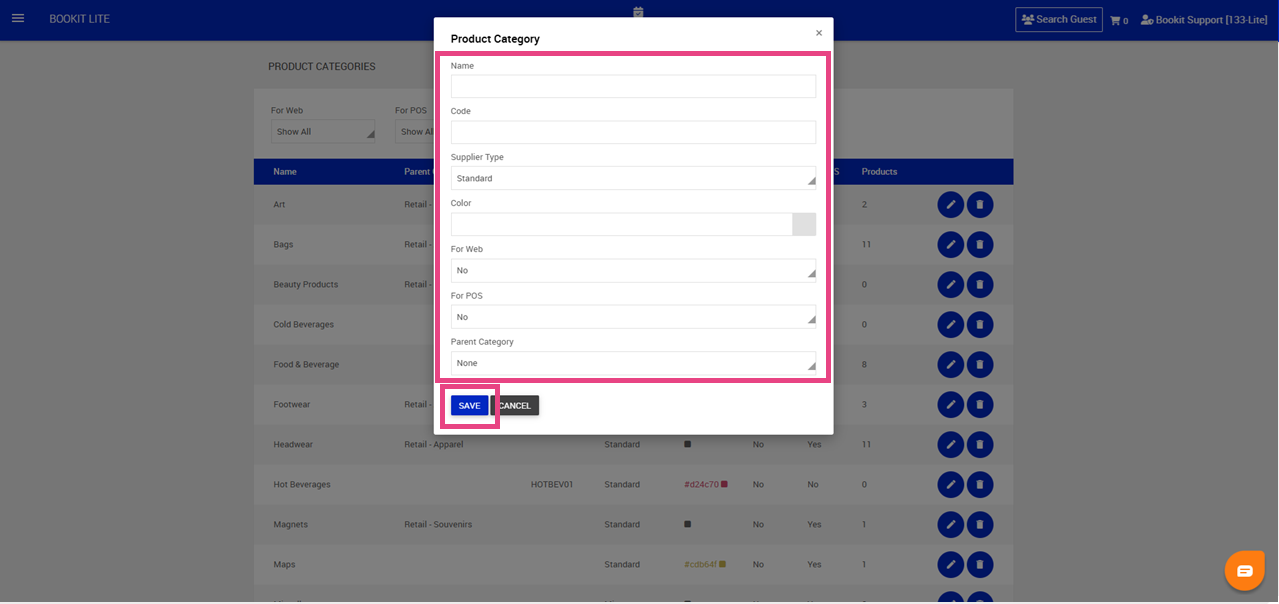
5. Complete the following:
Name: Enter the name of the sub category. This name will display within the POS retail screen.
Supplier Type: Select whether the sub category is used for Standard items (retail products sold through the POS) or Miscellaneous items (non-retail items sold through the Miscellaneous tab, such as third-party services).
Colour: Select the button colour used within the POS retail screen. Leave this empty to use the default system colours.
For Web: Select Yes or No. Recommended setting is No unless your centre sells retail products online.
For POS: Select Yes or No to control whether the sub category displays within the POS retail screen.
Parent Category: Select the existing parent category this sub category belongs to. This is a required step.
6. Click Save
Adding a Sub Category to a Product
1. Open the left-hand navigation menu.
2. Select Retail.
3. Select Product .
4. Select the pencil icon to the right to edit an existing product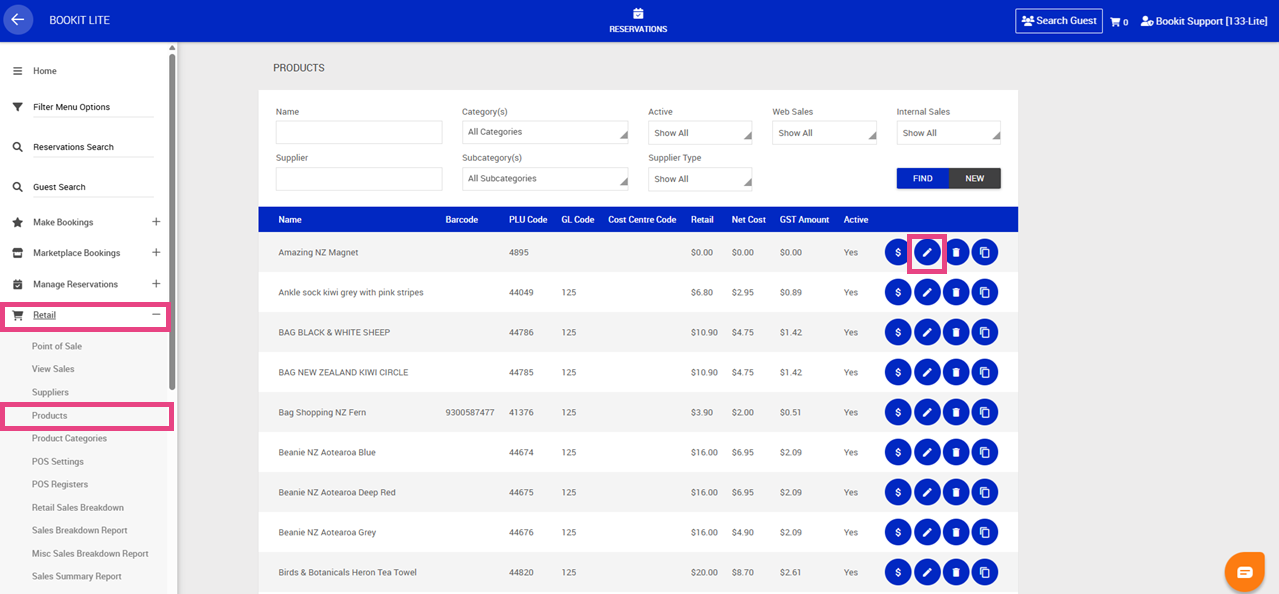
5. Click the Categories tab
6. Select the Parent Category and Sub Category
7. Click Save