This article explains how to set up Booking Locations and Stock Locations within Bookit Lite POS. A location is simply a label for an area within your visitor centre, such as a front counter, storeroom, or online sales channel.
Booking Locations are used to identify where bookings and payments are made, while Stock Locations identify where retail stock physically exists. A location can be configured as a Booking Location, a Stock Location, or both depending on how your business operates.
Accessing Booking Location Settings
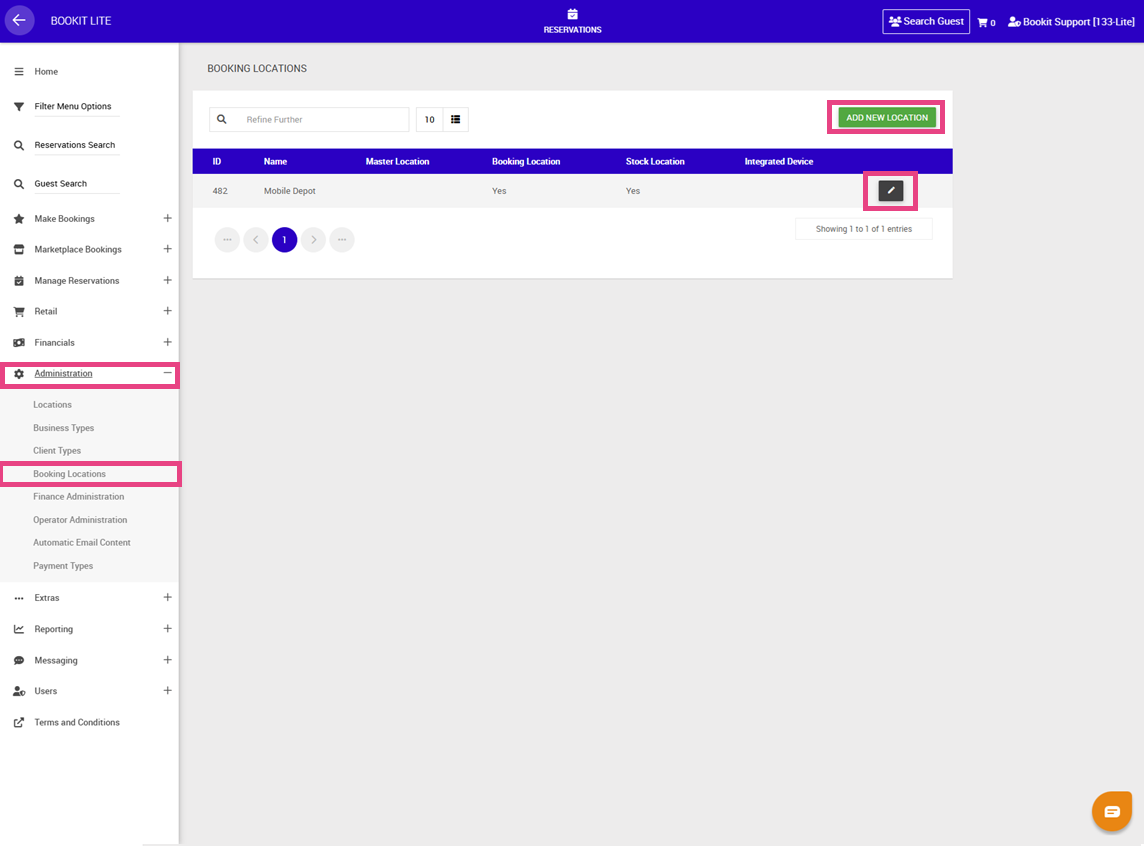
1. Open the left-hand navigation menu.
2. Navigate to Administration.
3. Select Booking Locations.
4. Select pencil to edit the booking location or Add New Location to setup a new booking location.
Creating a New Booking Location
1. Complete the above steps
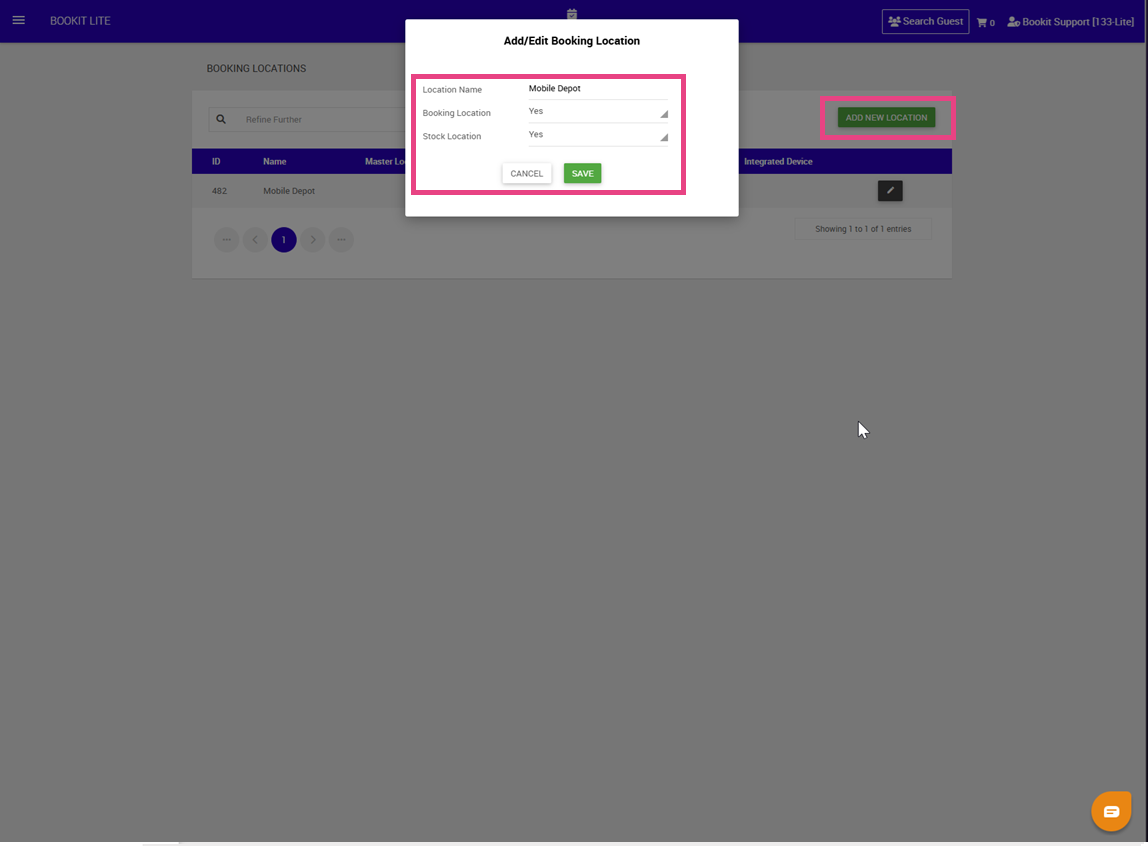
2. Complete the following:
- Location Name: The booking location name appears on; itineraries, receipts
- Booking Location: Yes / No: Is this booking location a register/till?
- Stock Location: Yes/ No: Is this booking location where retail stock physically sits?
3. Click Save
Creating a New Register
1. Open the left-hand navigation menu.
2. Navigate to Retail
3. Select POS Registers
4. Click Add Register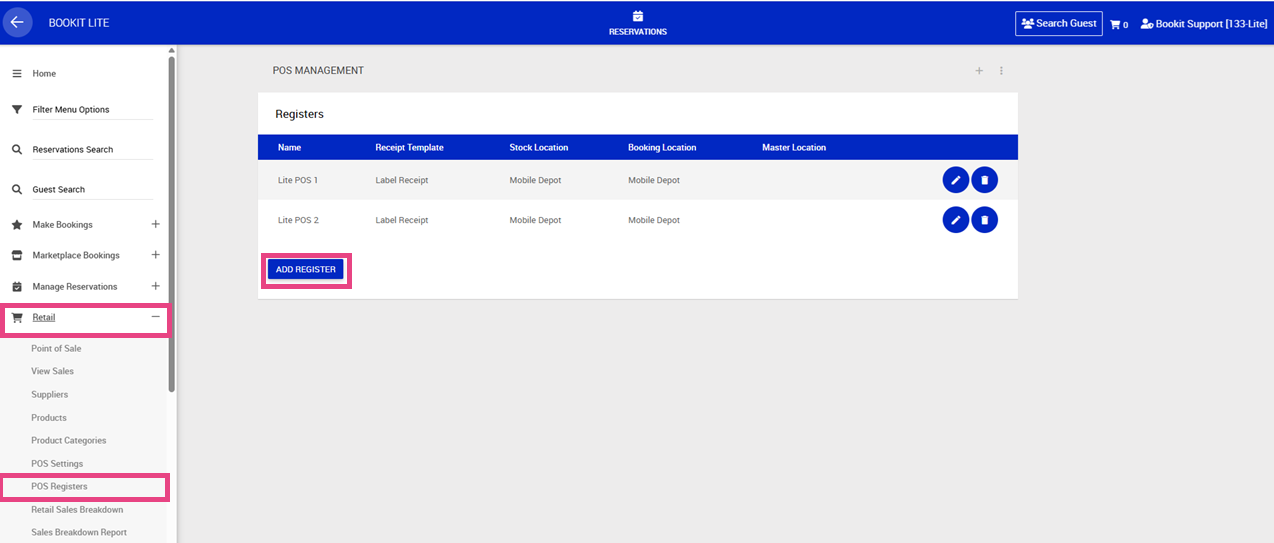
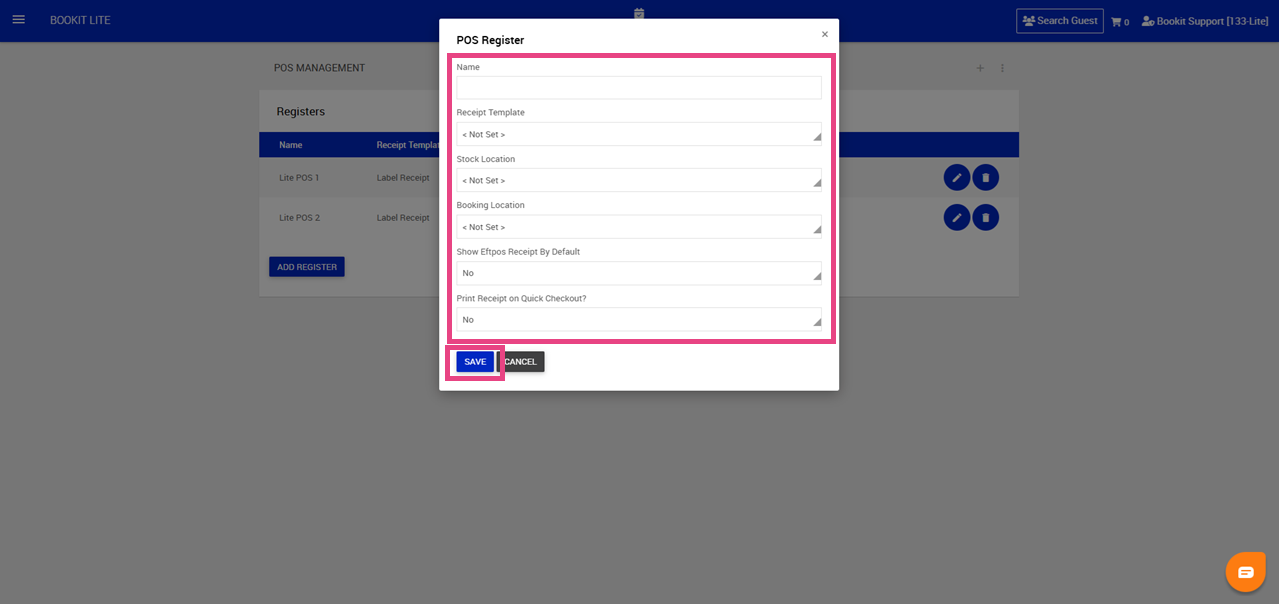
5. Complete the following:
- Name: Enter the name of the register. This should match the physical register or till staff are using.
- Receipt Templates: Select the receipt printer type used by this register. Available options: A4 or Label Printer
- Stock Location: Select the Stock Location linked to this register. This determines where stock is deducted from when products are sold through POS.
- Booking Location: Select the Booking Location linked to this register.
- Show Eftpos Receipt By Default: Yes/ No
- Print Receipt on Quick Checkout: Yes/ No: Enable this setting if receipts should automatically display or print when using Quick Checkout in POS.
6. Click Save