This article explains how to process a retail sale in Bookit Lite, including adding products to a transaction, capturing guest details (if required), and finalising payment.
Accessing your Point of Sale
Point of Sale (POS) is accessed from the Bookit Lite dashboard. Before starting a sale, ensure you are logged into the correct booking location and register.
1. Log into your Bookit Lite console.
2. From the dashboard screen, select, Retail (Your dashboard will display the functionalities your user should have access to and therefore may appear different to the below) 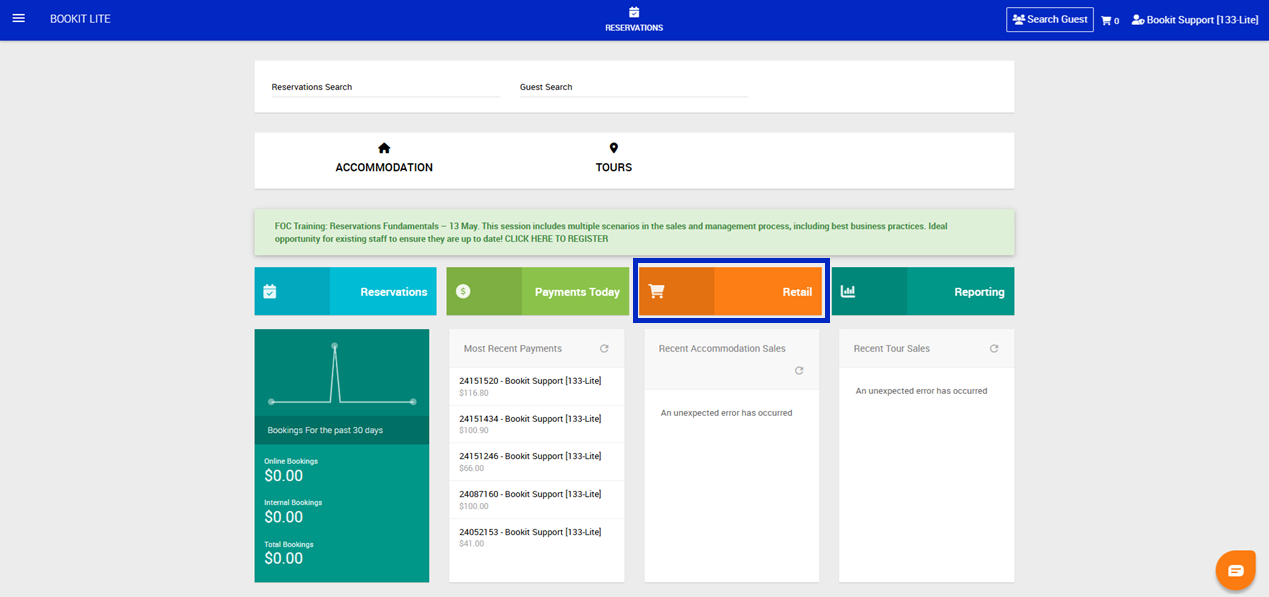
3. A pop up will appear to select your register. Select your register > Click Save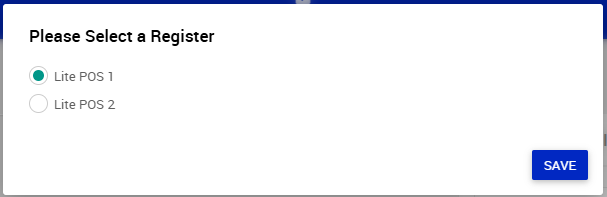
4. You will now be taken to the POS screen. Should you ever need to change your register, you can do so by clicking, Change in the top right hand corner.
Note: Please ensure you are logged into the correct booking location before processing transactions.
If your centre uses SmartPay integrated terminals, the SmartPay icon helps confirm you are connected to the correct terminal.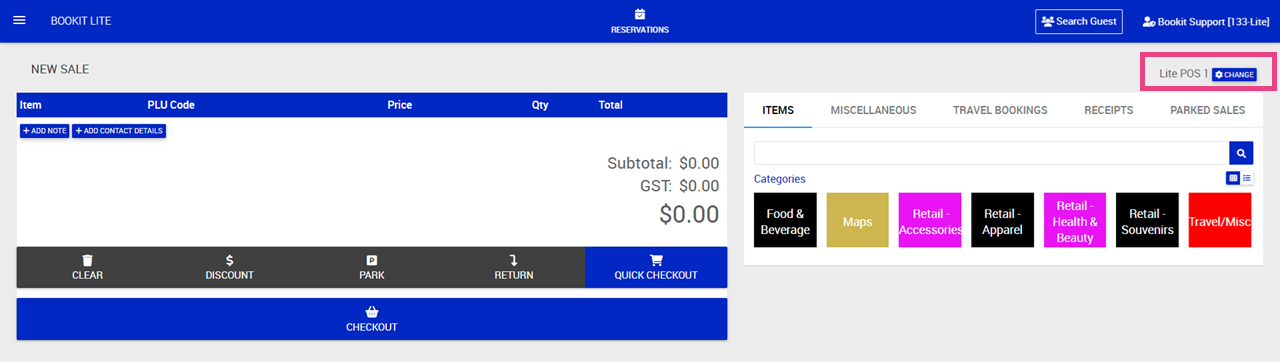
Adding Products to a Sale
Products can be added to the shopping cart using either a barcode scanner, entering a PLU code, using the buttons provided or a manual product search.
Add a Product Using a Barcode Scanner
1. Click anywhere within the POS window.
2. Scan the product barcode using the scanner.
3. The product will automatically be added to the shopping cart.
Add a Product Using a PLU Code
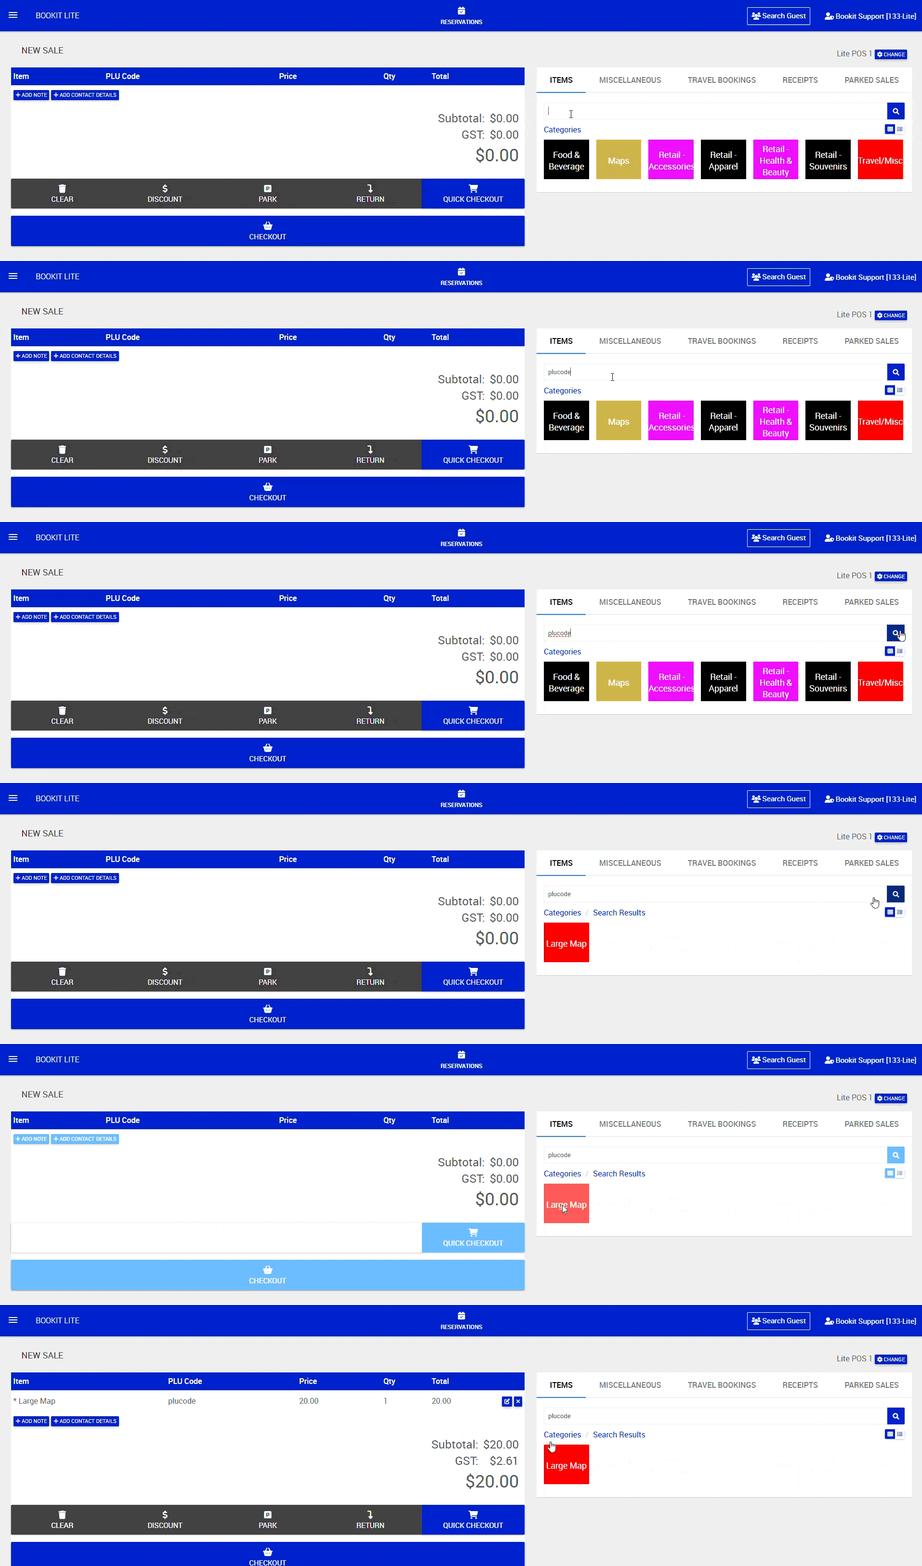
1. Under the Items tab click into the Search bar > Type your PLU code and click Enter or the Search button
2. The corresponding item will appear on the screen > Select the button of the item
3. The product will automatically be added to the shopping cart.
Add a Product Without a Barcode Scanner
1. Select the appropriate product category icon button or type in the name of the item and click Enter or the Search button
2. Select the required product.
3. The product will automatically be added to the shopping cart.
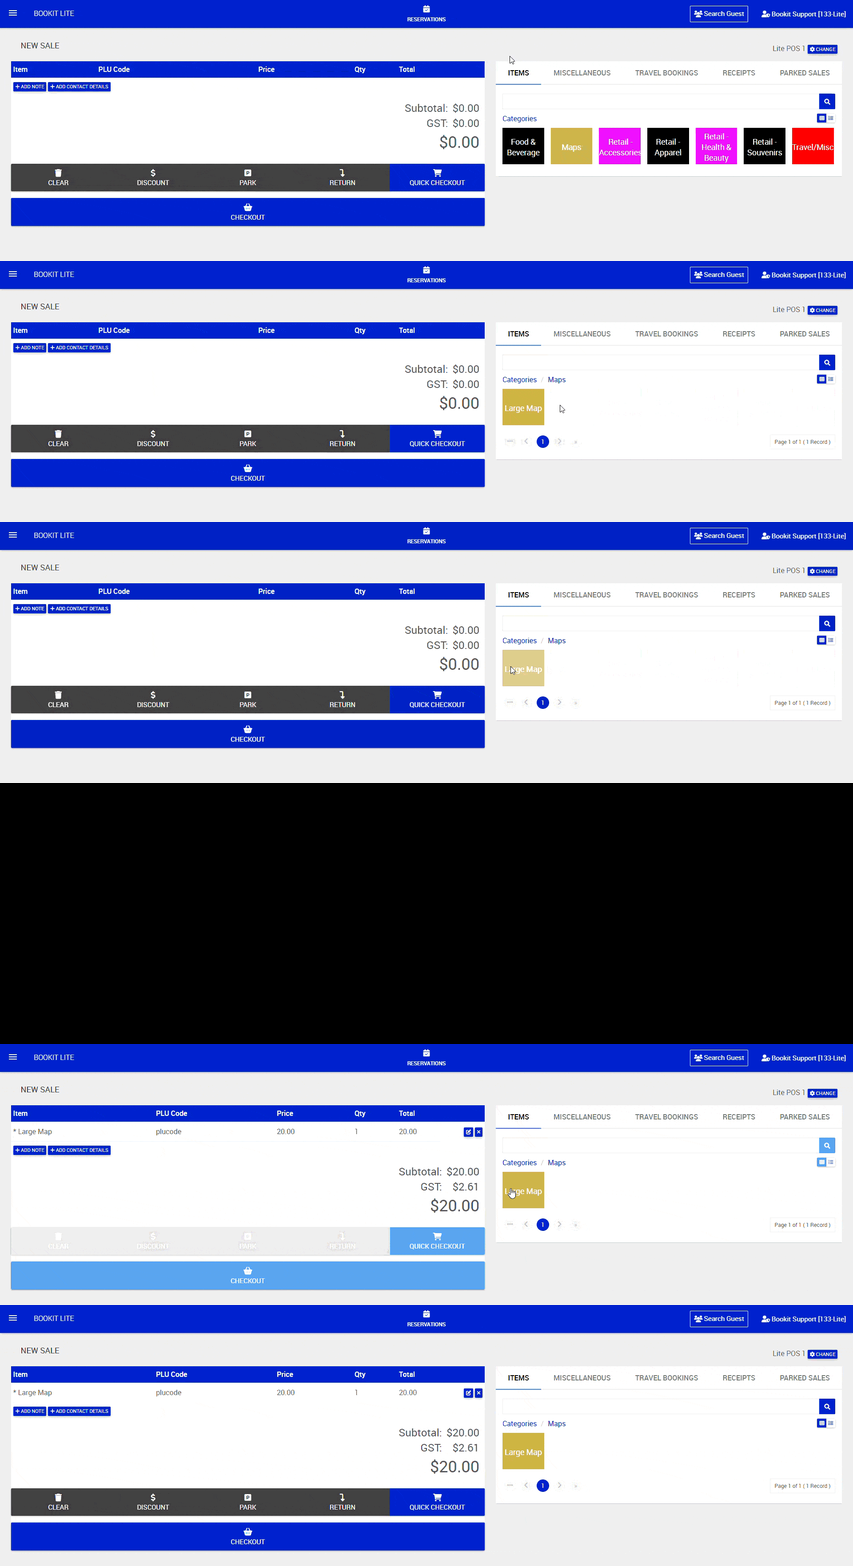
Continue the above until all items have been added to the sale.
Managing Products in the Shopping Cart
Products added to the shopping cart can be updated or removed before completing the sale.
Remove a Product
1. Locate the product in your sale
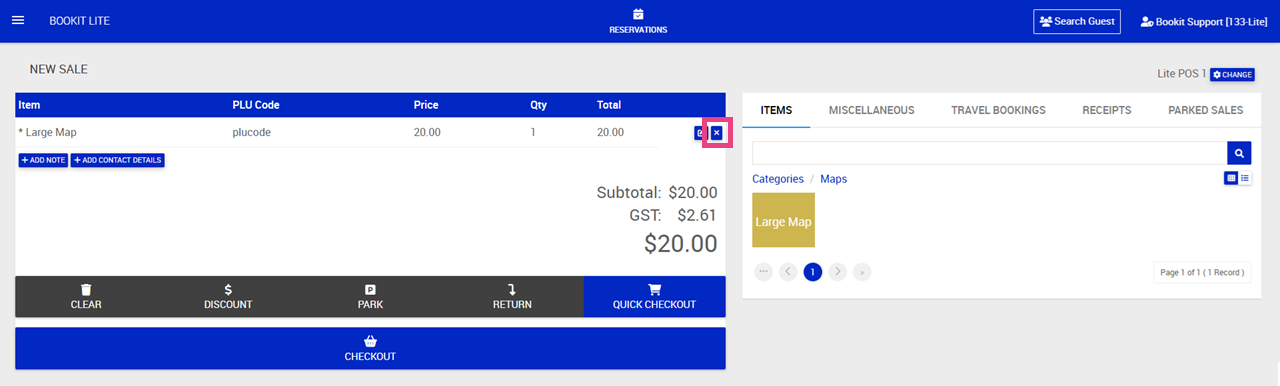
2. Click the "x" icon beside the product line to the right.
3. The product will be removed from the transaction.
Adjust Product Quantity
1. Locate the product in your sale
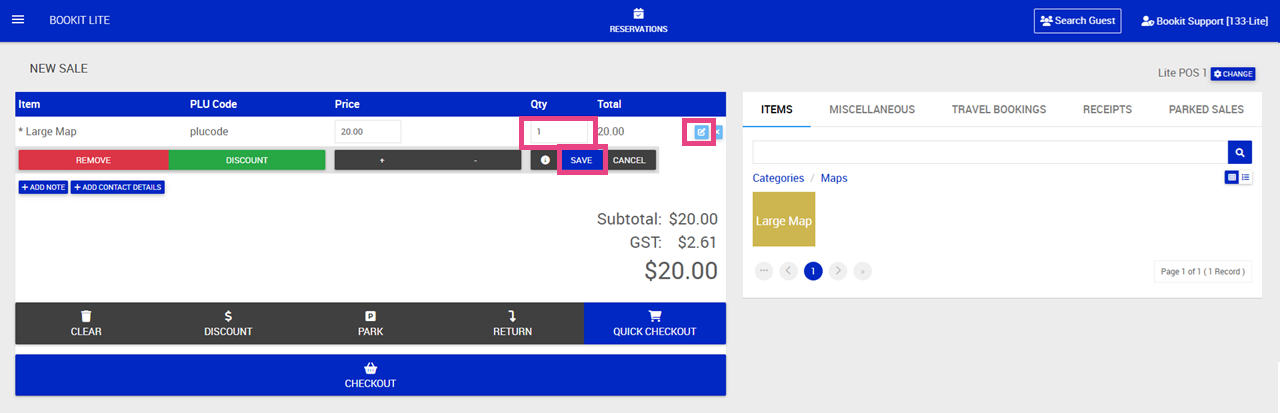
2. Click the "pencil" icon beside the product line to the right.
3. Edit the quantity under the Qty column > Click Save
Adding a Note
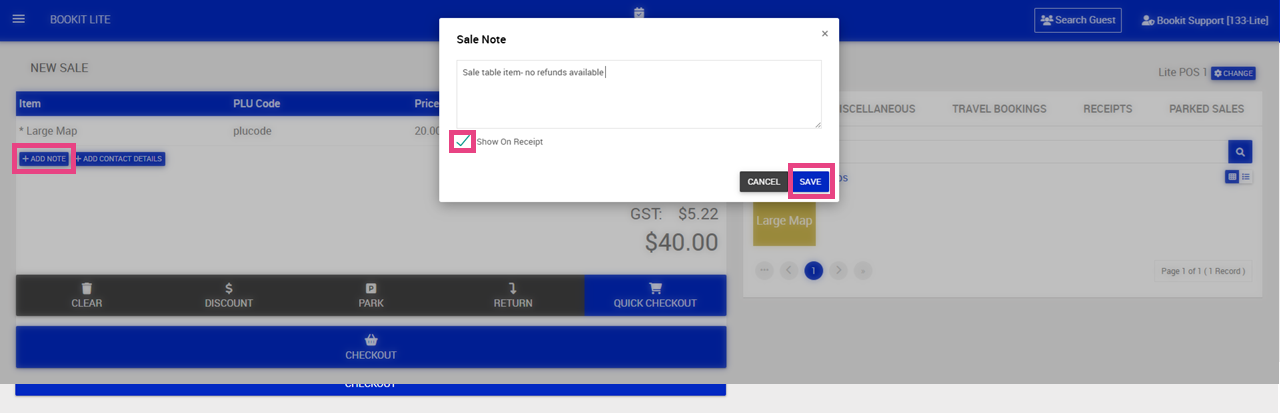
1. Click + Add Note
2. Type in note in the pop up screen.
3. To display the note on the receipt, click Show on Receipt. Alternatively if unticked it will only show in Bookit
4. Click Save
Clear the Shopping Cart
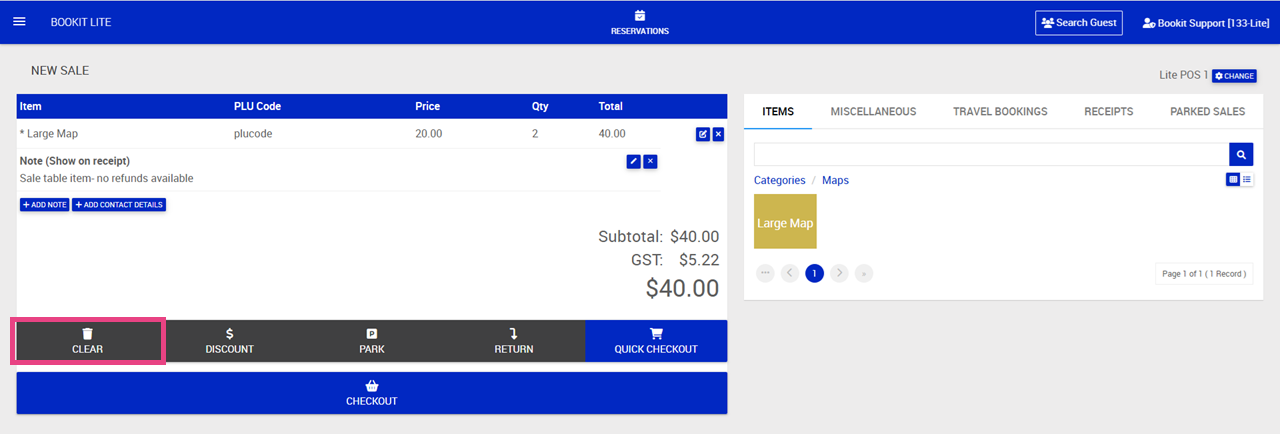
1. To remove all products from the transaction: Click the, Clear button.
2. All items will be removed from the current sale.
Finalising the Sale
Once all products have been added to the cart, proceed to checkout to complete payment.
1. Review the shopping cart contents.
2. Select Checkout.
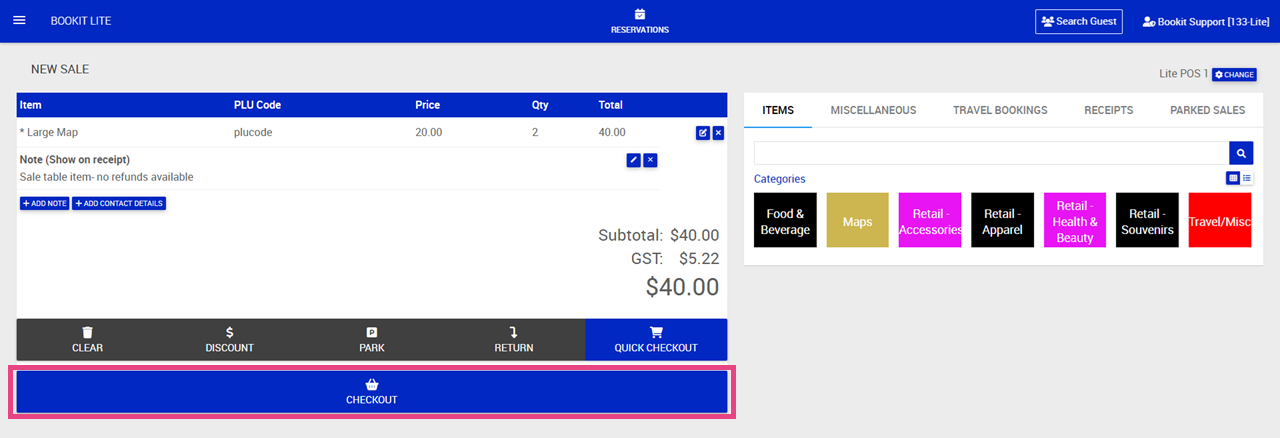
3. If your system is configured to have Credit Card Fees, pending the payment type if applicable click Remove Fees
4. Once your fees have been reviewed, you can then choose the appropriate payment method to complete the transaction.
5. If paying by Cash, you can enter the amount tendered and the system will tell you the change amount to be given > Click Charge
If paying by Eftpos, confirm the amount to be charged is correct > Click Charge
6. A receipt will pop up on the screen, click Print should the customer require a copy of the receipt or Close.